Example Outdoor Kitchen Projects in Auburn, Washington

Each example follows one outdoor kitchen job from the first visit to the finished work. It shows the house, what the owners wanted, what the work involves, how long it takes and roughly what it would cost.

Straight grill island on a paver patio

Example project
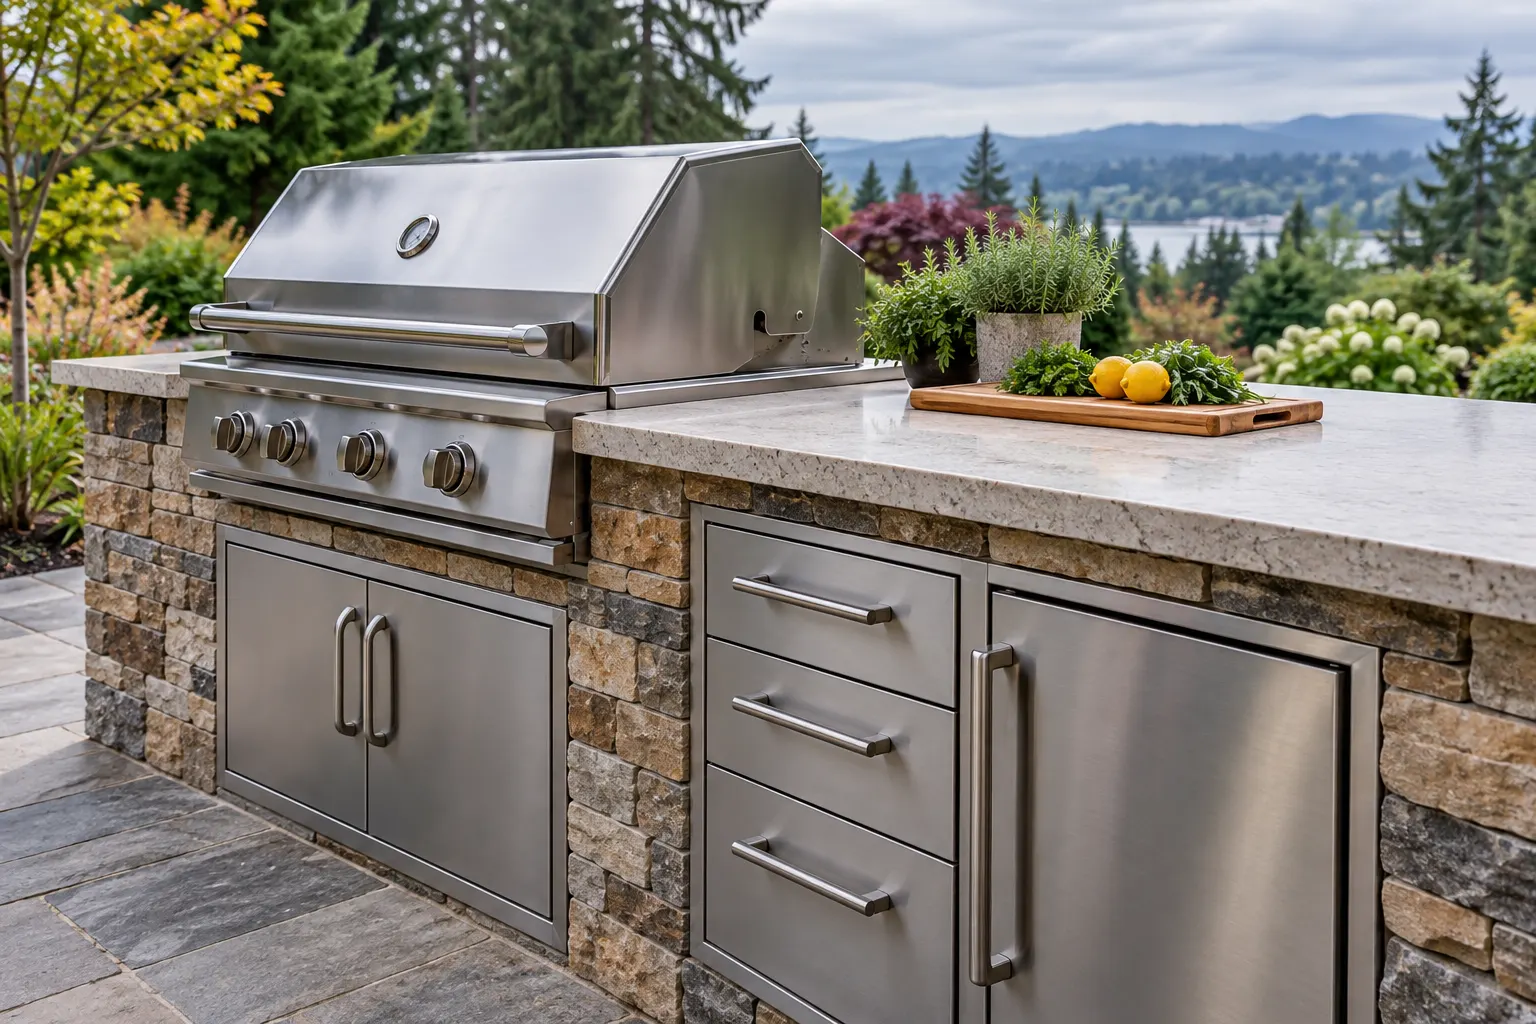
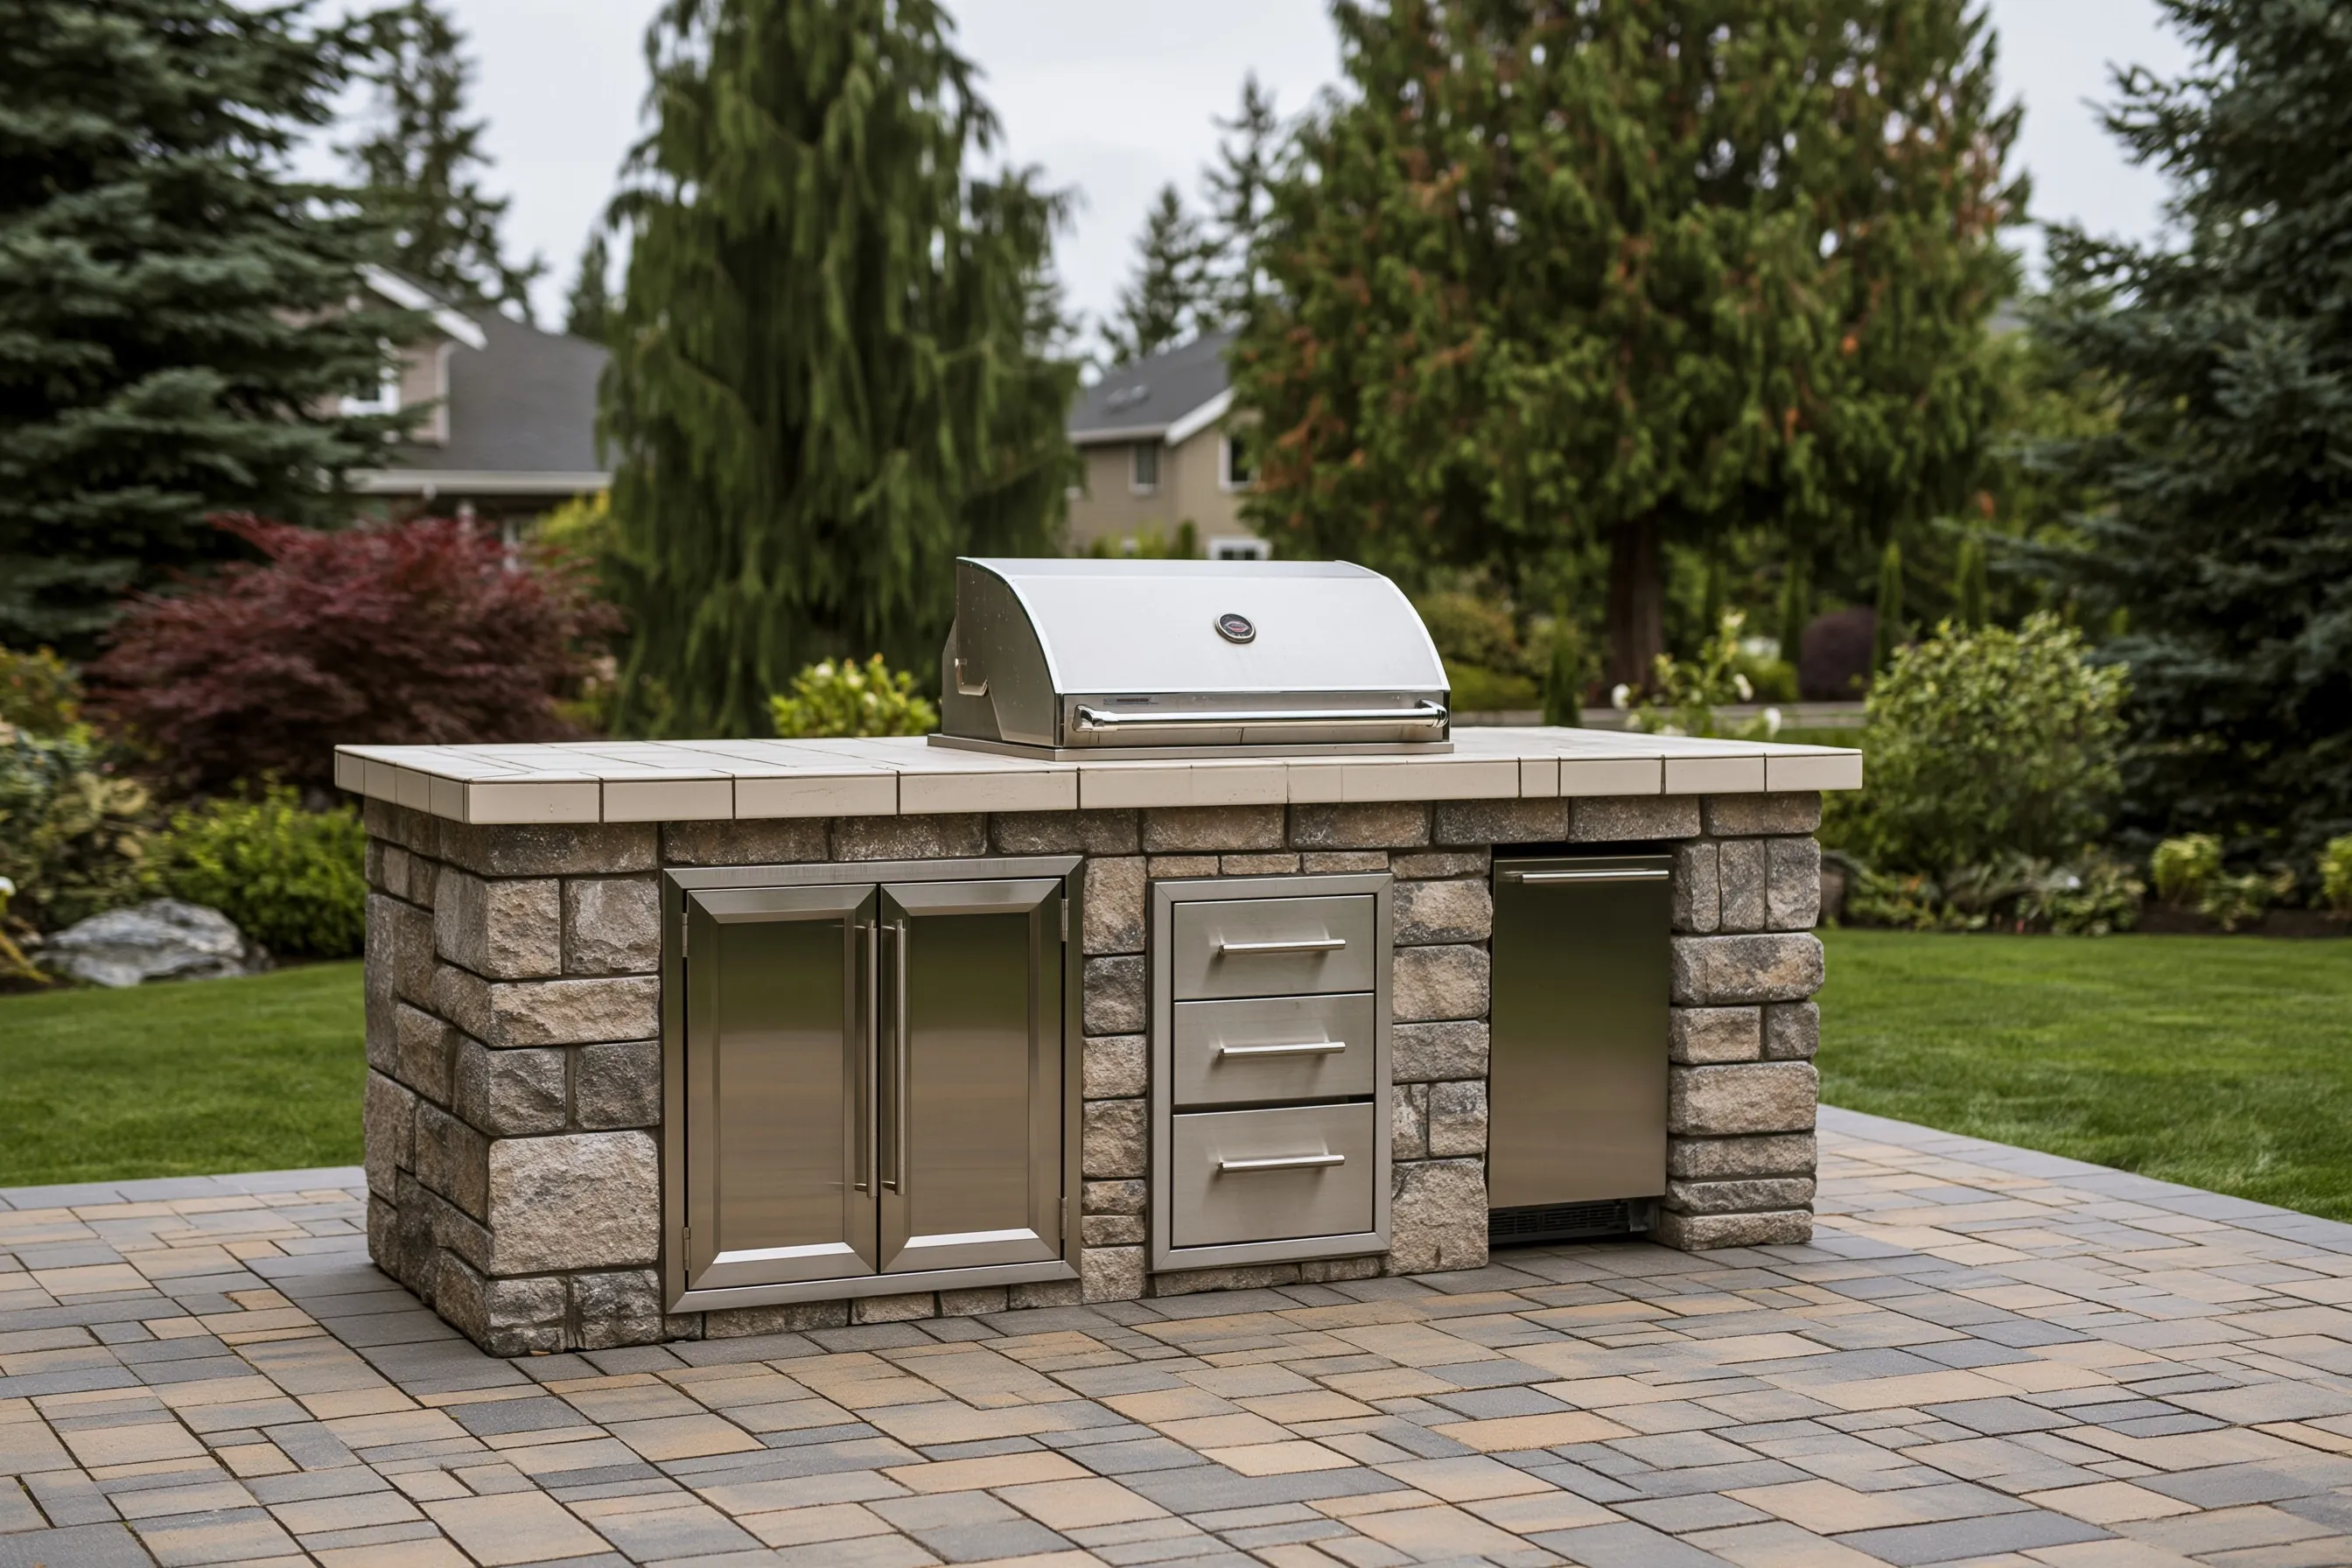
Straight stone grill island with a stainless grill, double doors, a stack of three drawers and a pale stone counter
Home
2000s house in Auburn with a paver patio
Original request
A built-in grill in place of a grill on wheels
Layout
Straight island, about 8 ft long, on the existing patio
Grill
Built-in gas grill with four burners, about 36 inches wide
Island
Block base with stacked stone, a pale granite counter, double doors under the grill, three drawers and a tall door
Timeline
About two weeks once the grill is on site
Cost
$10,500

Scope of work

A block base on the existing patio, stacked stone facing, a granite counter cut for the grill, stainless doors and drawers, the grill set in and connected to the gas line already at the patio, and a leak test. The grill is part of the cost.

Project overview

In this example, the owners of a 2000s house in Auburn want to swap the grill on wheels at the edge of their patio for a built-in one. They want counter space on one side, closed storage below and no other appliances for now.

The patio is level and in good shape, and a gas line already reaches it. We choose the grill first, so the opening in the base and the cutout in the counter fit that model exactly.

The goal

The goal is a solid island that fits the chosen grill, with counter space and storage close at hand.

Process

  1. Before work Grill chosen, the base under the pavers checked, and a permit for the gas hookup applied for if the city needs one.
  2. Week one Block base laid and left to set, then the stone facing goes on.
  3. Week two Counter cut and set, doors and drawers fitted, grill connected and leak tested.
  4. Handover We show the owners the gas shutoff, how to light the grill and how to care for the counter.

Planning right

  • Choose the grill before the island is drawn. Each model needs its own cutout and clearances.
  • Leave counter space on at least one side of the grill for plates and tools.
  • Ask for a gas shutoff you can reach without opening the grill.
  • If a sink or fridge might come later, we leave room and a path for the lines now.
Get a free quoteMore about built-in BBQ islands

L-shaped grill island with a fridge and seats

Example project

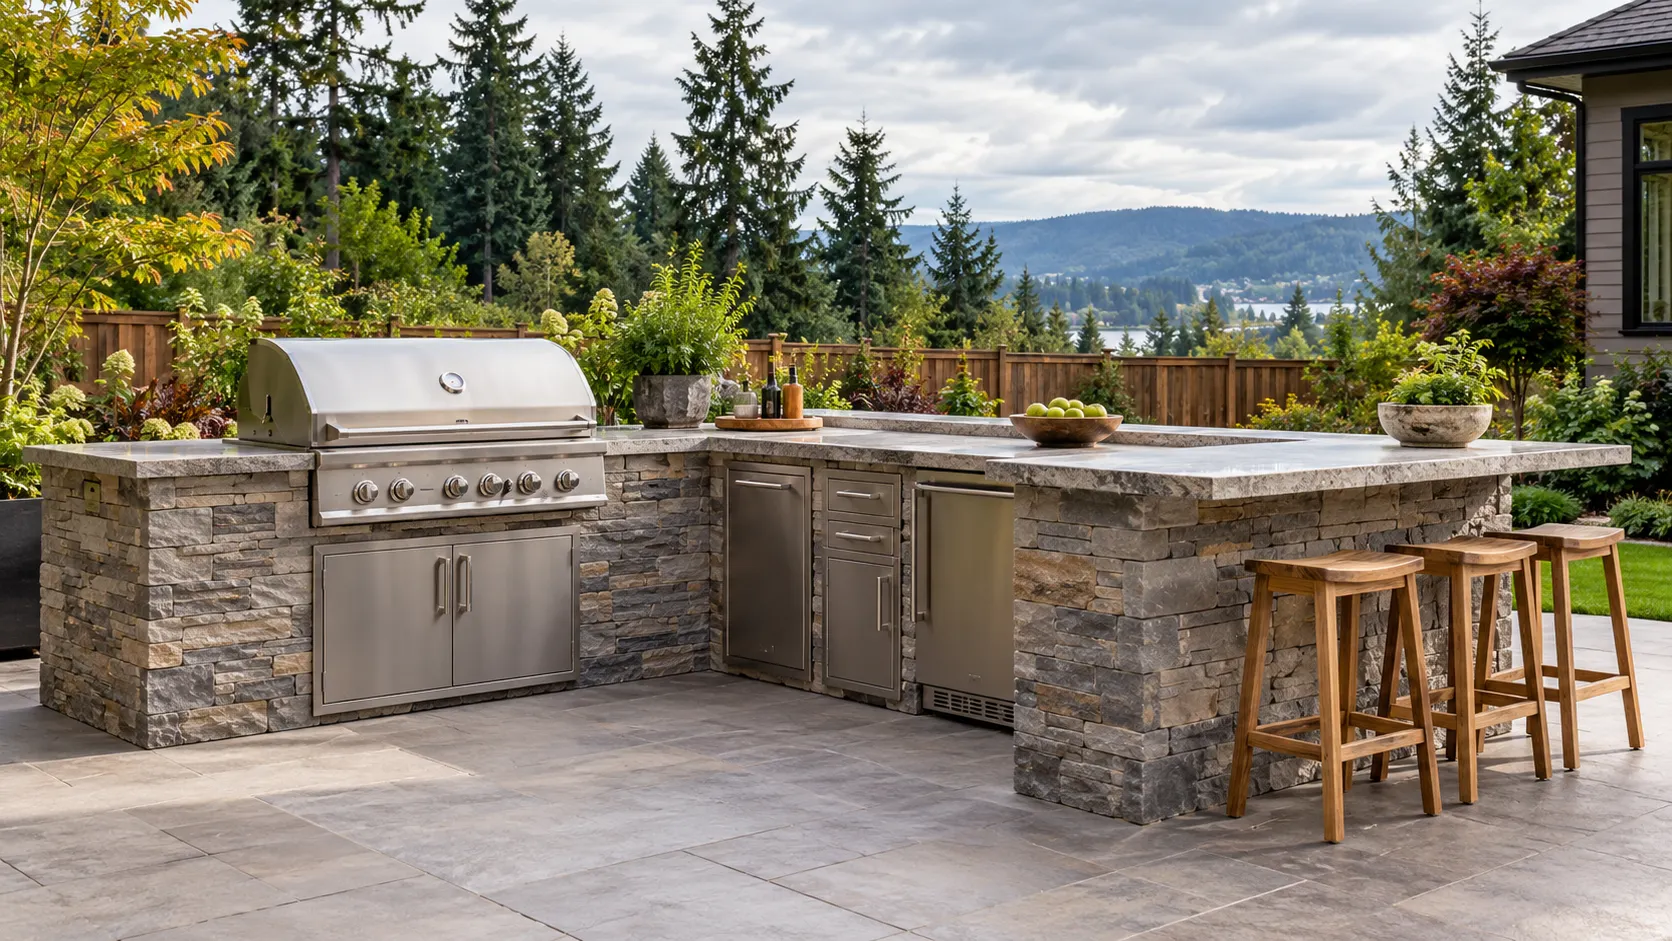
L-shaped stone kitchen island with a stainless grill, doors and drawers, an outdoor fridge and three wooden stools at the end
Home
1980s house in Federal Way with a large paver patio
Original request
A grill, a fridge and seats for guests, all in one island
Layout
L-shaped island, about 11 ft along the back and a short return that seats three, about 14 ft in all
Island
Block base with stacked stone, a pale stone counter, a built-in gas grill, double doors, drawers, a tall door and an outdoor fridge
Utilities
Gas line and an outdoor outlet already near the patio
Timeline
About three weeks once the grill and fridge are on site
Cost
$22,500

Scope of work

A block base in an L on the existing patio, stacked stone facing, a stone counter with an overhang for three stools, stainless doors and drawers, the grill and an outdoor fridge set in, the gas connected and leak tested. The grill and fridge are part of the cost. Stools are extra.

Project overview

In this example, the owners of a 1980s house in Federal Way cook for family and friends most summer weekends. They want the grill, a fridge and seats in one island, so guests can sit with the cook but stay clear of the grill.

The grill, storage and fridge run along the back of the L. The short return ends in a counter overhang with room for three stools. A stone island is heavy, so before anything is built we lift a few pavers and check the base under the patio.

The goal

The goal is one island where the cook has room to work and guests have a place to sit, on a patio that can carry it.

Process

  1. Before work Grill and fridge chosen, the patio base checked, and permits applied for.
  2. Week one Block base laid in an L, with openings along the back sized for the grill, the fridge and the doors.
  3. Week two Stone facing goes on and the counter is measured.
  4. Week three Counter set, grill, fridge, doors and drawers fitted, gas connected and leak tested.

Planning right

  • Keep the seats at the far end of the L, away from the grill.
  • An outdoor fridge needs an outdoor-rated model and the air gap its maker asks for.
  • Leave about 3 ft behind the stools so people can walk past.
  • Check the patio base before work starts, not after the stone is on.

Get a free quoteMore about built-in BBQ islands

New doors and drawers for an older grill island

Example project

Straight stone-faced grill island with a tile counter, stainless double doors, three drawers and a tall door
Home
1990s house in Auburn
Original request
Closed storage in a grill island that only has open shelves under the counter
Island
Block island, about 7 ft long, with a tile counter in good shape
Work
Open bays reframed, stainless double doors, a three-drawer stack and a tall trash pullout fitted
Kept
The counter, the grill and the stone facing
Timeline
Three days of work once the doors and drawers arrive
Cost
$4,400

Scope of work

The old shelves taken out, the open bays cleaned and reframed to fit, stainless double doors, a three-drawer stack and a trash pullout fitted and lined up, and the gaps around the frames closed. The counter and grill stay.

Project overview

In this example, the owners of a 1990s house in Auburn have a block grill island with open shelves under the counter. Leaves, rain and spiders get in, so nothing is kept there.

The tile counter and the grill are fine, so they stay. We reframe the open bays to fit stainless doors and a drawer stack, sized to the openings already there, and add a trash pullout next to the grill.

The goal

The goal is closed, dry storage under the counter without rebuilding the island.

Process

  1. Before work Bays measured and door and drawer sizes chosen to fit them.
  2. Day one Old shelves out, bays cleaned and reframed to the new sizes.
  3. Day two Doors, drawers and the trash pullout fitted and lined up.
  4. Day three Gaps around the frames closed and every door and drawer checked for a tight close.

Planning right

  • Measure the openings before ordering. Outdoor doors and drawers come in set sizes.
  • Choose stainless made for outdoor use. It holds up better in the rain.
  • Drawers near the grill hold tools. Doors further away hold supplies.
  • If the counter will be replaced soon, do that before the new doors go in.

Get a free quoteMore about outdoor countertops and storage

Sink and fridge added to an existing island

Example project

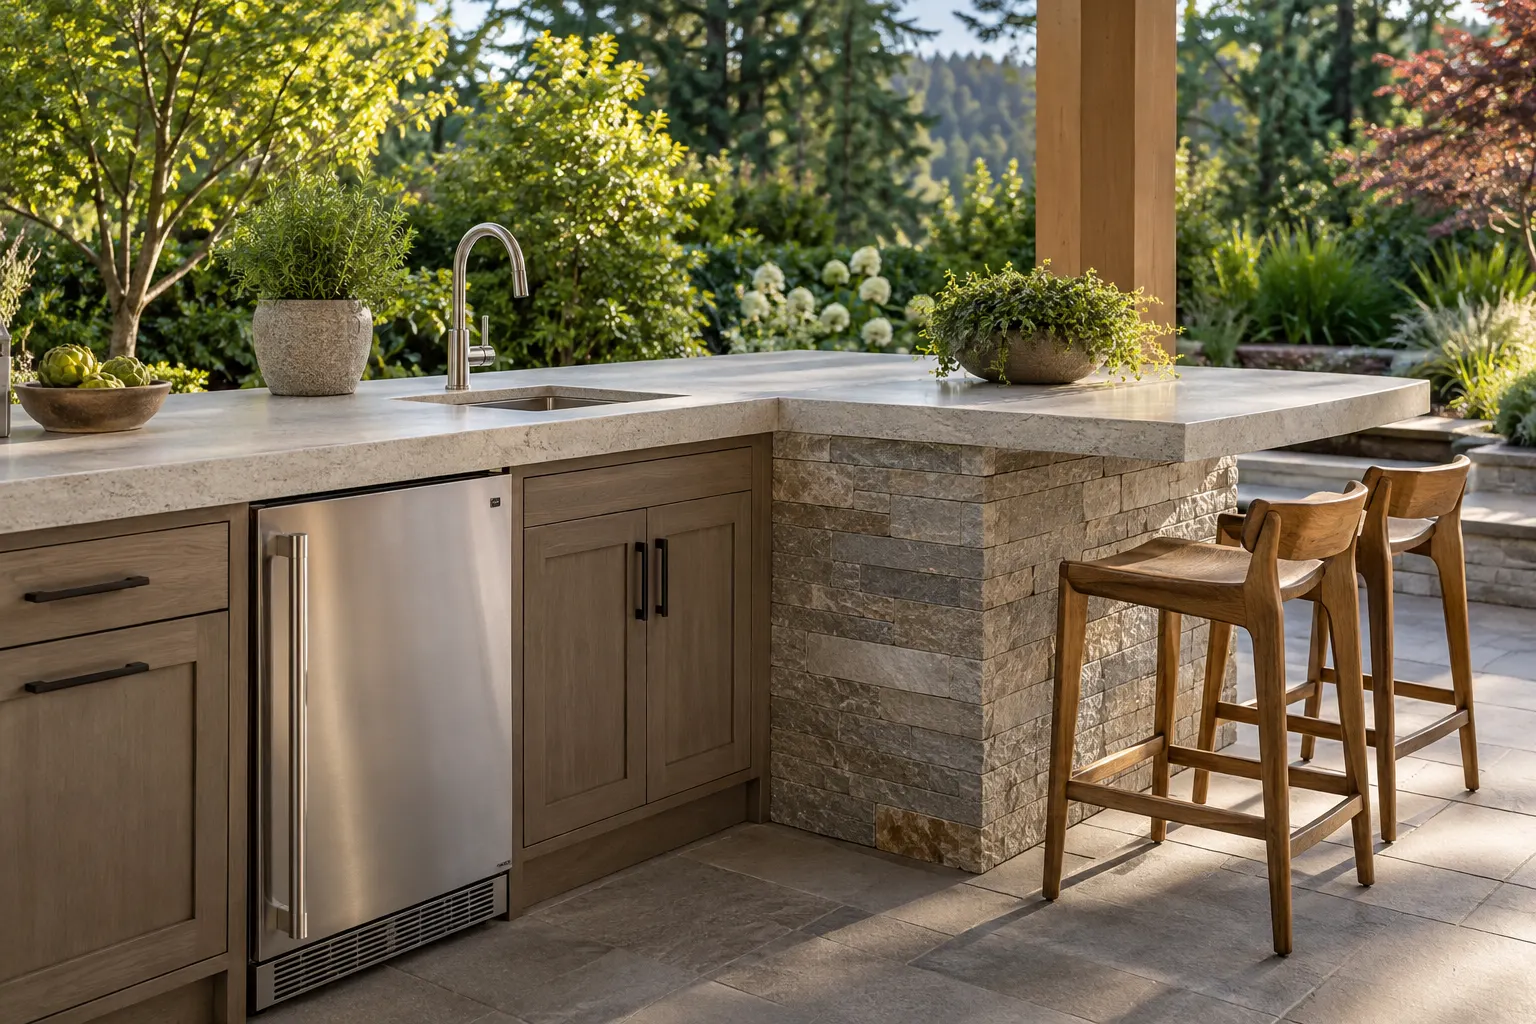
Outdoor counter with a sink and tall faucet, a stainless undercounter fridge, wood-look cabinets and two stools at a stone bar end
Home
1990s house in Algona
Original request
A sink and a drinks fridge in the island they already have
Island
Outdoor cabinets, a pale stone counter and a bar end with two stools
Work
Sink cut into the counter, fridge set into an empty bay, a cold water line, a drain and an outdoor outlet
Winter
A shutoff and drain valve inside the house so the line can be emptied before frost
Timeline
Three days of work
Cost
$5,600

Scope of work

The counter cut for an undermount sink and the sink and faucet set. A cold water line from the house with an inside shutoff and a drain back to the house sewer line, both under the patio edge. An outdoor outlet for the fridge, the fridge set in and the pavers put back. The fridge, sink and faucet are part of the cost.

Project overview

In this example, the owners of a 1990s house in Algona already have an outdoor island with cabinets and a bar end. They want to rinse vegetables and keep drinks cold without walking back into the house.

The first question is where the sink drains, so we confirm the drain route before the counter is cut. Then a cold water line and the drain go in under the patio edge, and a new outdoor outlet powers the fridge. The water line has a shutoff inside the house so it can be drained before the first frost.

The goal

The goal is water and cold drinks at the island, with a water line that can be emptied for winter.

Process

  1. Before work Drain route confirmed, sink, faucet and fridge chosen, and permits applied for.
  2. Day one Counter cut for the sink and a trench opened at the patio edge for the lines.
  3. Day two Water line, drain and power run and connected, the trench closed and the pavers put back.
  4. Day three Sink and faucet set, outlet finished, fridge slid in and everything tested.

Planning right

  • Plan where the sink drains before you choose the sink.
  • A water line outside needs a way to drain it before freezing weather.
  • Choose a fridge made for outdoor use. An indoor fridge will not last outside.
  • In Washington the electrical permit for a new outlet comes from Labor & Industries.

Get a free quoteMore about outdoor sinks and refrigeration

Two-sided bar counter at the end of a grill island

Example project

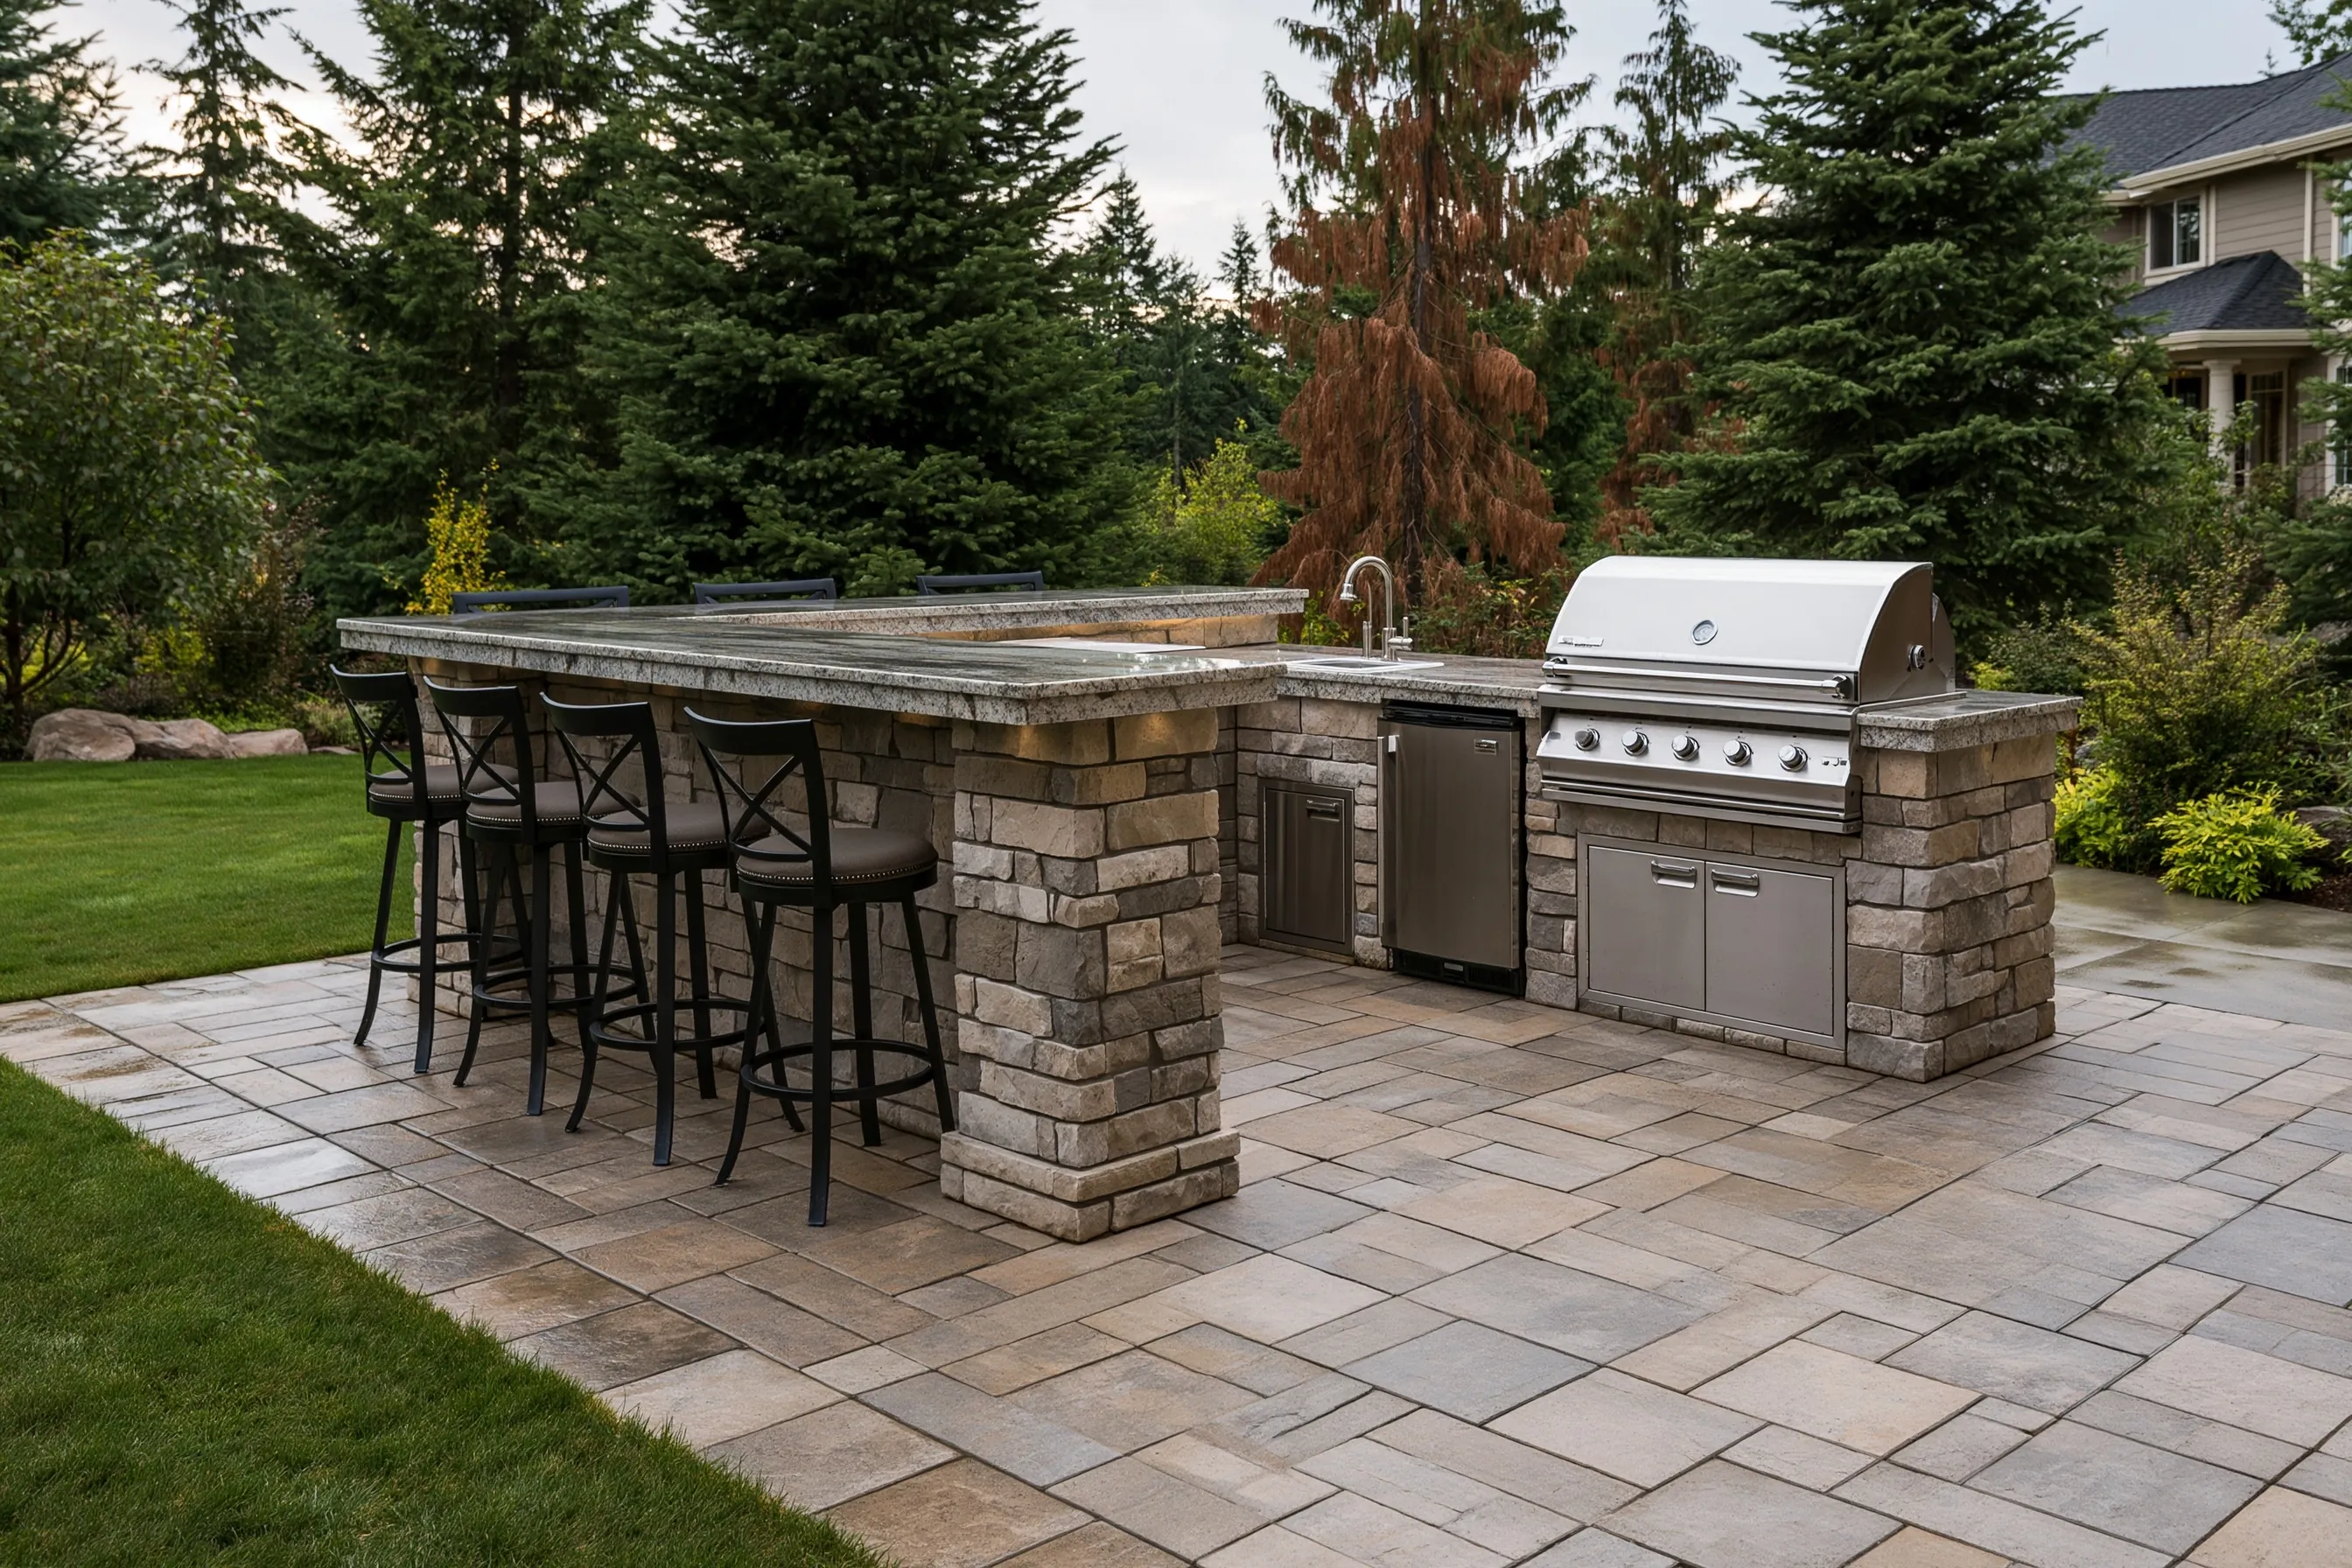
Straight stone-faced grill island with a sink and fridge, and a raised two-sided granite bar at one end with stools on both sides
Home
2000s house in Pacific
Original request
Room for family and friends to sit and eat at the grill island
Layout
Raised bar counter built onto the sink end of the island, about 12 ft long and wide enough to sit at from both sides
Seats
Four bar stools on the lawn side and three on the far side, chosen by the owners
Finish
Stone facing to match the island and a granite bar top
Timeline
About two weeks
Cost
$9,800

Scope of work

A block base built onto the sink end of the existing island, stone facing to match, a deep granite bar top set on it at bar height so people can sit on both sides, and the area cleaned up. Stools are extra.

Project overview

In this example, the owners of a 2000s house in Pacific have a straight grill island with a sink and a fridge. They want a place where seven people can eat together outside.

We build a raised bar counter onto the sink end of the island, about 12 ft long, with four stools on the lawn side and three on the far side. The bar top sits higher than the cooking counter, so plates and glasses stay away from the grill.

The goal

The goal is a place for seven people to eat at the island, near the cook and clear of the grill.

Process

  1. Before work Stools chosen, bar height and top depth agreed, and the patio base checked under the new base.
  2. Week one Block base laid at the sink end of the island and left to set.
  3. Week two Stone facing on to match the island, then the bar top set and the area cleaned up.

Planning right

  • Keep the seats on the side away from the grill.
  • Allow about 2 ft of counter for each stool on each side.
  • A top deep enough for two rows of plates needs about 30 inches or more.
  • Pick the stools before the bar height is set. Bar stools and counter stools need different heights.

Get a free quoteMore about outdoor kitchen bar seating

Covered dining area beside a grill island

Example project

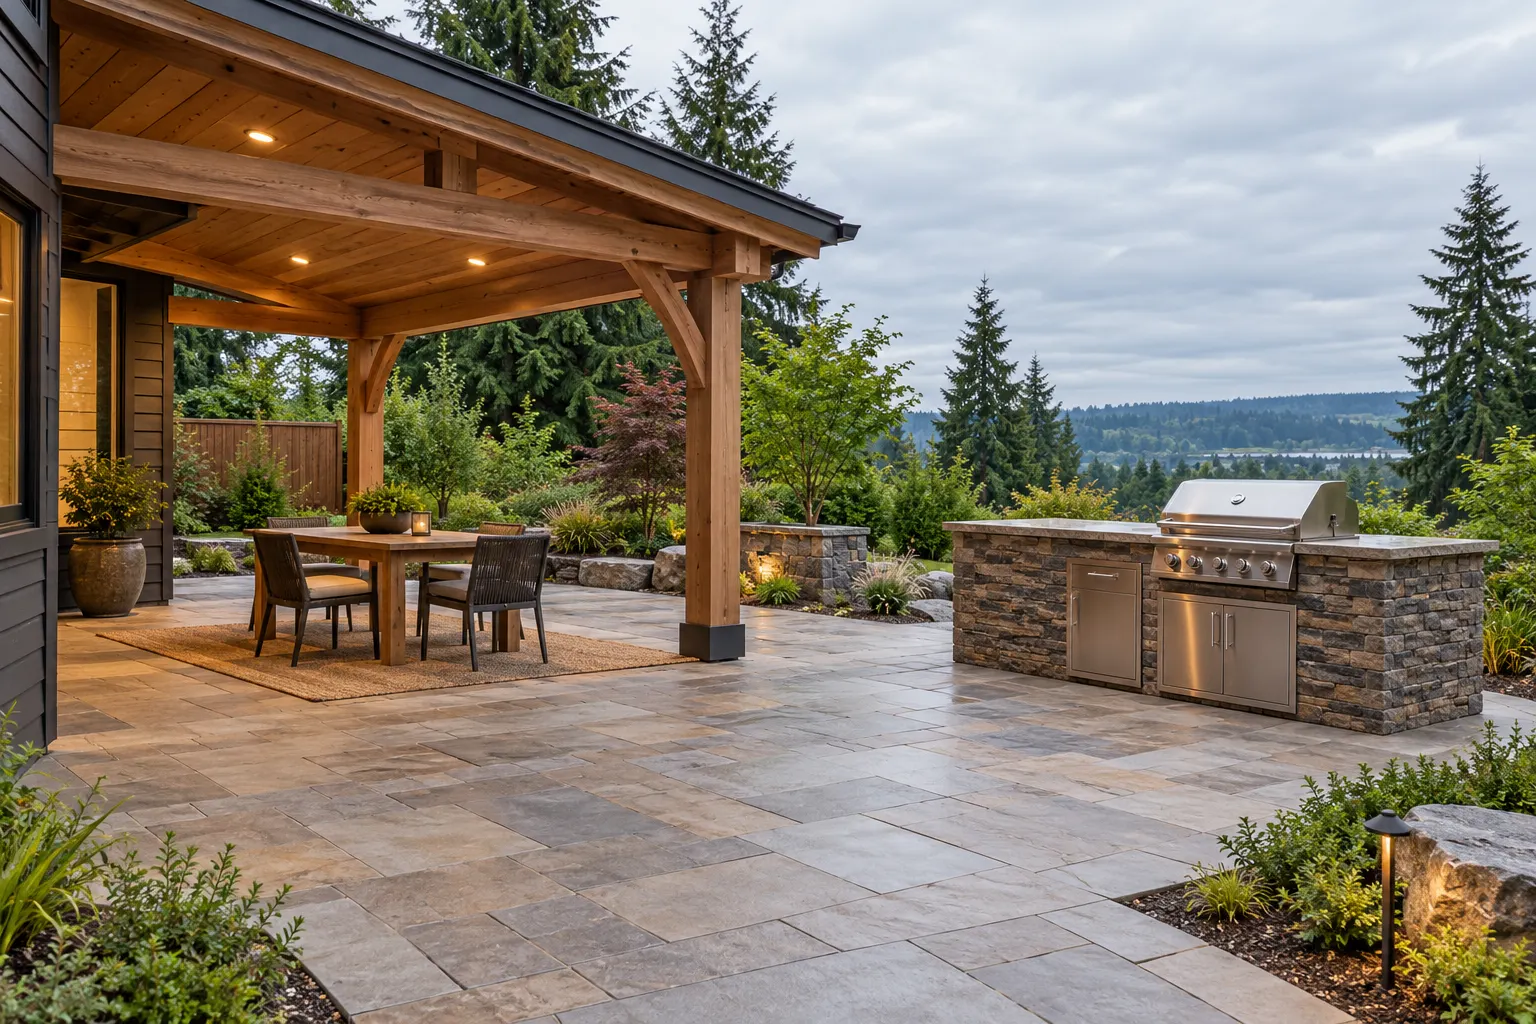
Timber patio cover with ceiling lights over a dining table next to the house, and a stone grill island in the open
Home
1980s house in Kent with a paver patio
Original request
A dry place to eat outside, next to the grill island they already have
Cover
Timber gable roof on posts, tied to the house, about 14 by 16 ft over the dining table
Grill
Left in the open, a few steps from the cover
Lights
Recessed lights in the ceiling
Timeline
Permit first, then about three weeks of work
Cost
$21,000

Scope of work

Footings for the posts, timber posts and beams, a gable roof tied to the house wall, roofing, ceiling boards with recessed lights, gutters, and the pavers put back around the posts. The grill island is not changed.

Project overview

In this example, the owners of a 1980s house in Kent have a grill island on their patio but nowhere dry to eat when it rains. They want a roof over the dining table, not over the grill.

With the grill left in the open, its smoke and heat rise freely and the roof does not need the clearance and venting a covered grill would. The cover is drawn and priced on its own, as a timber gable on posts tied to the house wall, with lights in the ceiling.

The goal

The goal is a dry place to eat beside the grill, with the grill still in the open air.

Process

  1. Before work Cover drawn with its size, posts and footings, and the building permit applied for.
  2. Week one A few pavers lifted, footings dug and poured for the posts.
  3. Week two Posts, beams and rafters up, then the roof sheathed and covered.
  4. Week three Ceiling boards, lights and gutters in, pavers put back and the patio cleaned up.

Planning right

  • Decide what sits under the roof before it is drawn. A grill under a roof needs its maker’s clearances.
  • Plan the lights and any outlets before the ceiling boards go up.
  • Gutters on the cover keep rain off the edge of the patio.
  • Ask for the cover and any kitchen work to be priced as separate lines.

Get a free quoteMore about covered outdoor kitchens

Request a free outdoor kitchen quote

Tell us what you would like to build, roughly how big the patio is, whether gas, water or power already reach it and where the property is. We'll get back to you soon to arrange a visit or with any questions we have. Estimates are free and there's no obligation.

Call (253) 398-9523